Friday, October 29, 2021

Oculus Quest 2 Links

Tom’s VR channel on YouTube:

https://www.youtube.com/playlist?list=PLqgCTR39KD1e98zpUecdXiHifzBp4lXGc

or https://bit.ly/3JSqkHS

(Tom is “thmoore301” on YouTube…)


Tom's 360 files on Dropbox: https://bit.ly/2ZxujGX

Bob Page's 360 files on Dropbox: https://bit.ly/3lv7XhR


This page: 

thmoore.blogspot.com


Sunday, September 13, 2020

How To Deliver A Beer With A Drone

After a fair amount of experimentation, I am very pleased to have successfully figured out how to deliver a beer via drone. 

And I am even more pleased to share this breakthrough with the aviation world. I Googled this problem hard. Lots of people provided terrific insight into individual parts of this problem, but no one, as far as I can tell, put all the pieces together. (You're welcome. Nobel prize nomination instructions are found here.)

This project was launched during the 2020 coronavirus pandemic, but future generations should not assume that the aims of this project were any more important during the era of social distancing. They were not. It was a pure "waste of time"/"holy quest." Even in pandemic times, you could just leave a beer on your friend's porch if you wanted your friend to have a beer. 

I am realizing as I write this that I have included a lot of links to Amazon products. I don't do any sort of affiliate program; I just literally bought most of this stuff from Amazon. Also, I probably could have cut this into a YouTube video, but it's easier for readers to absorb the details in text form, and I don't have a YouTube channel I'm pushing.

Please also note well that there are also likely federal laws that prescribe what you can drop with a drone, as well as state liquor laws that would prohibit dropping a beer to a minor. It is your responsibility to find out what these are and act accordingly.


EQUIPMENT USED

Drone: A DJI Mavic Air 2. The Mavic Air 2, which weighs only 570 grams, can lift a surprising amount; one test showed it can lift another 830 grams, for "a whopping power index of 1.43," as calculated by DroneDJ.com.

Air Dropper: A remarkably cheap air dropper ordered from AliExpress.com. Delivery was posted as being around 2 months, but I received it in 24 days for a total of $25.20, including shipping. 

It basically works by watching the auxiliary light on the drone, and pulling back a pin (thus releasing the payload) when that light turns on. It works (see my short review).

Other, presumably much better, droppers can cost around $160. I'm sure they're great, but I'm super-happy with this one.

Parachute: A very nice Apogee 36" ripstop nylon chute, ordered from Amazon. ($17.80 + $9.20 shipping – not sure why such a light item cost nine bucks to ship...)

Some parachutes have some way to attach something to the top of them, which might have made dragging it into the air easier. This one does not. 

Beer: 12 oz. can of Budweiser.

Beer bottles weigh too much, 556 grams vs. 368g for the can.

(Bud Lite would weigh even less, obviously.)

Beer sling: Homemade from paracord (instructions here).

Other materials: 

Thick split rings, $6.91 for 10 from Amazon, to connect parachute to payload. Lesser split rings failed to handle the force of the parachute snapping open, as we shall see.

Lesser split rings I scavenged from key tags I had around the house, which were good for other uses. 

Standard paracord I already had.

Cheap carabiners I had around the house. For the stresses that can be generated by the size payload a Mavic Air 2 can lift, these seem to hold up just fine. None have shown any deformation in the tests I've run. 


WEIGHTS AND MEASURES

What's strapped to the drone
Air Dropper (without legs)53g
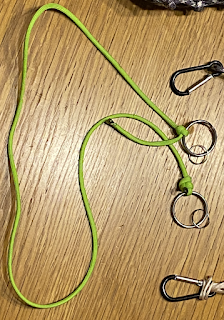
Connecting cord (with 2 strong, 2 lesser split rings)17g
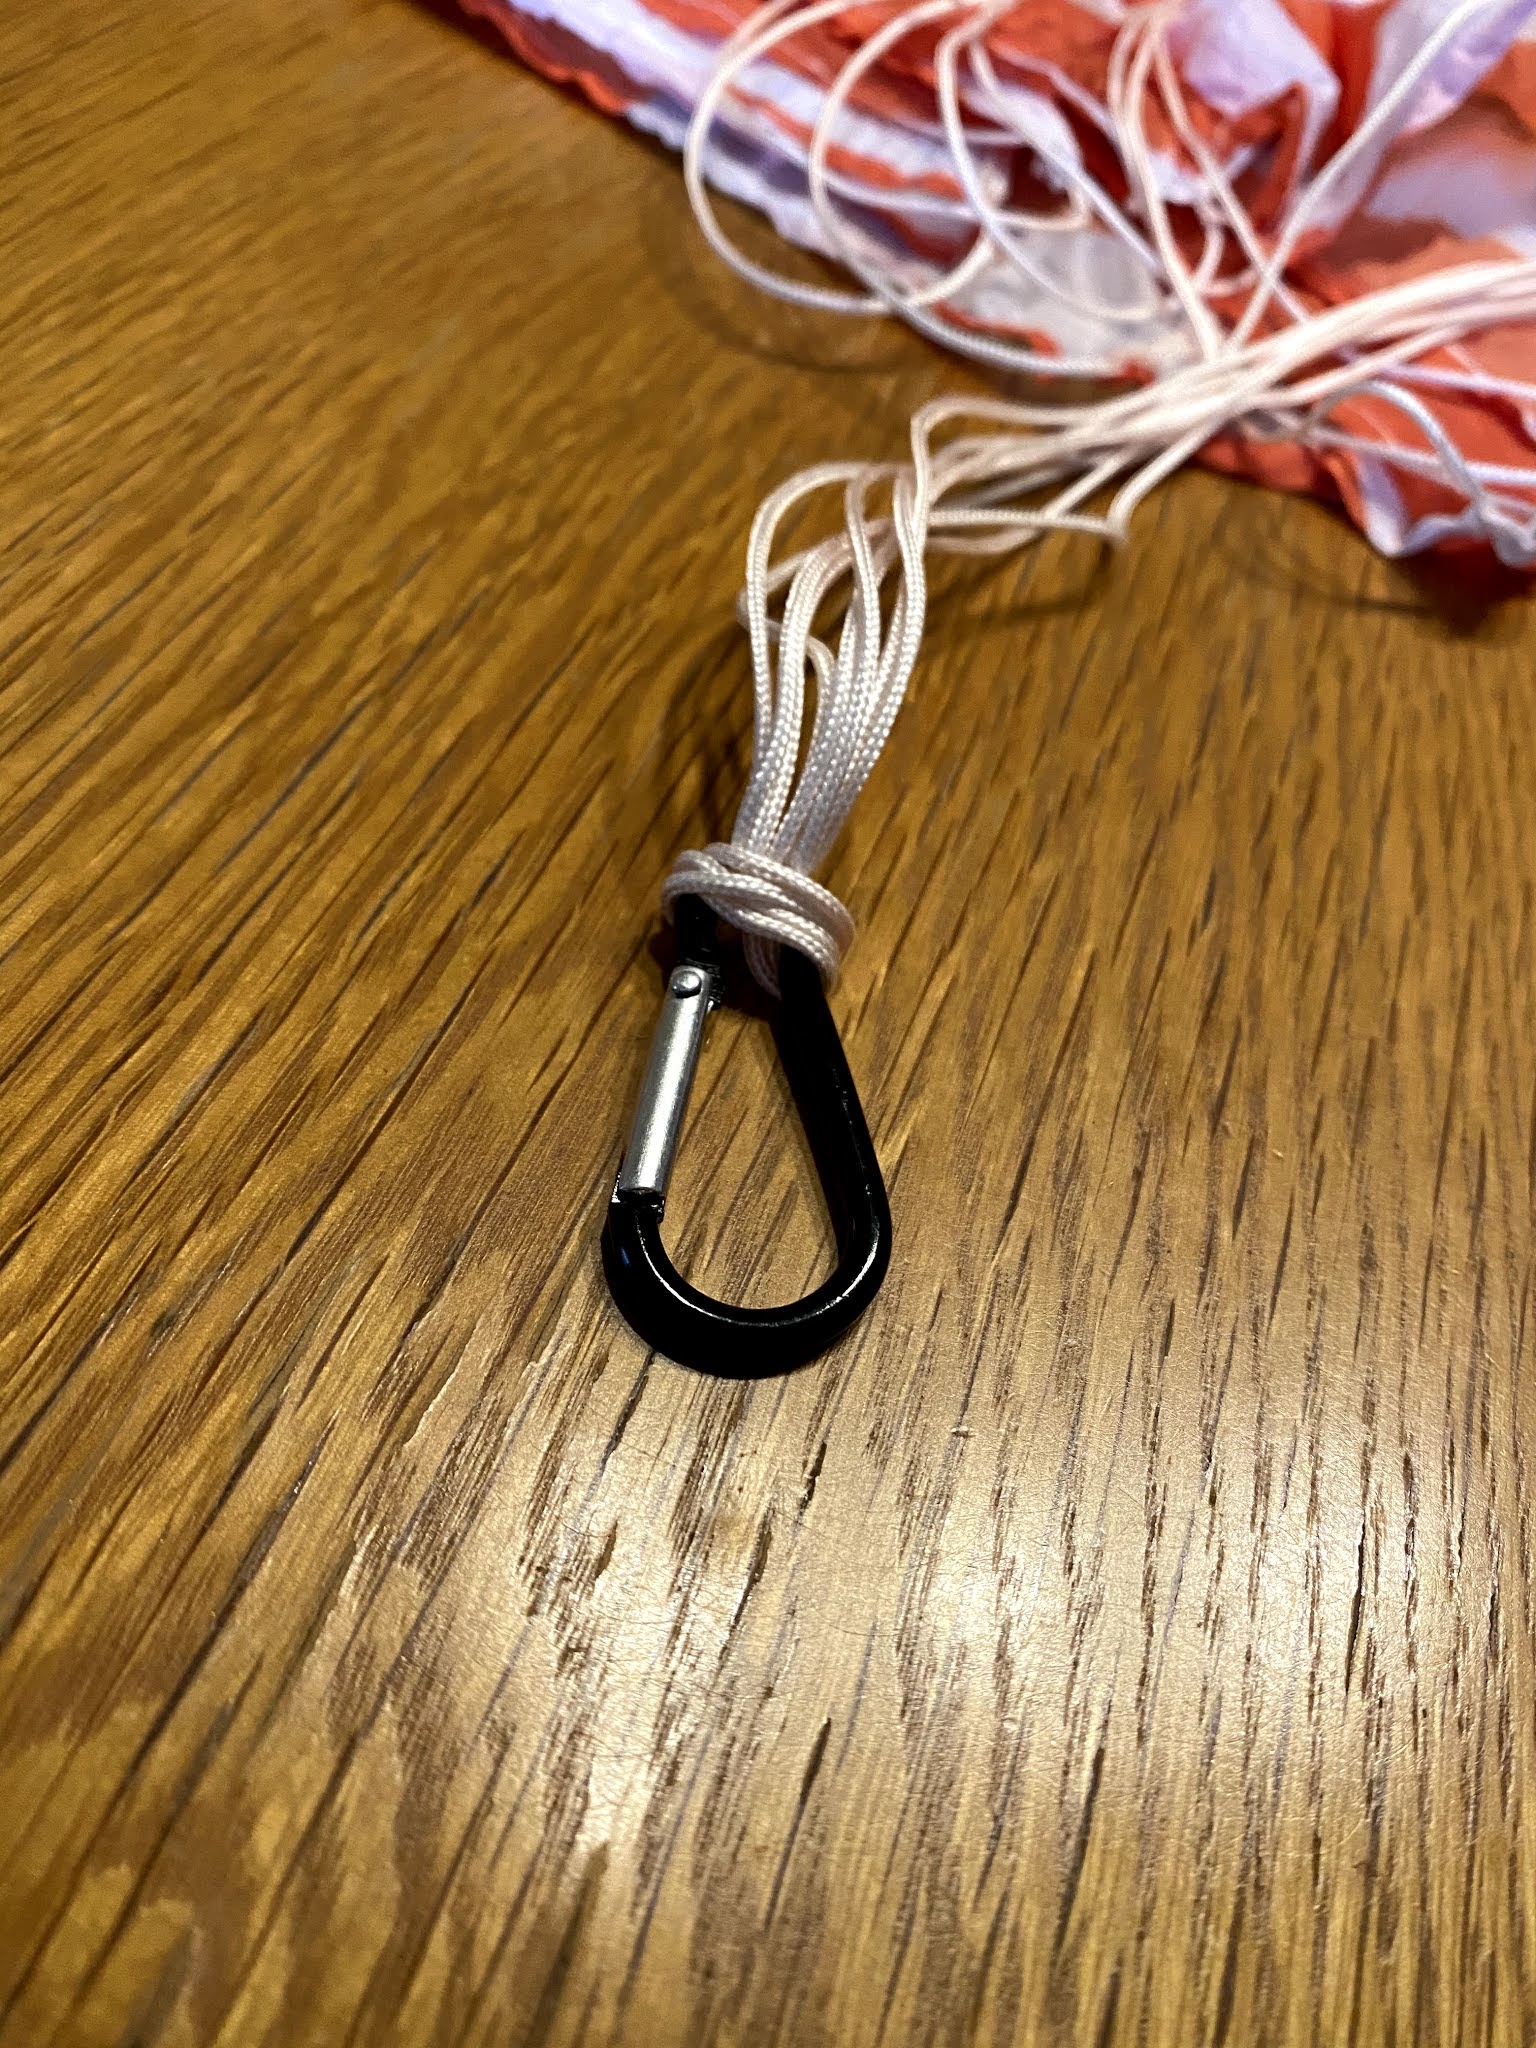
Parachute with cheap carabiner43g
Paracord can holder with cheap carabiner48g
All equipment: 165g

Payload
Can of Budweiser

368g

Total lifted load: 

533g
Mavic Air 2's total tested lifting capacity
(though it cannot really navigate
with this much aboard)
830g

Some individual components
Strong split rings (apiece)6g
Cheap carabiners (apiece)4g
Legs for the Air Dropper18g

Two things I didn't lift
Bottle of beer (Heineken)556g
Life jacket (standard Stearns)460g

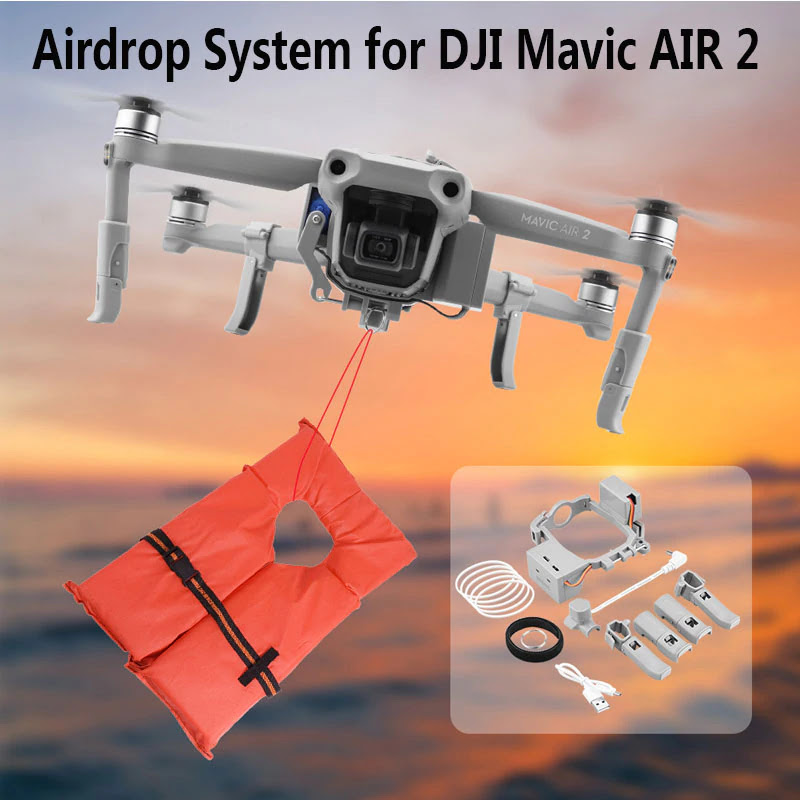
I'd thought that the picture that AliExpress was using to sell the Air Dropper was ridiculous, something that a guy would show to his significant other to try to justify his increasingly expensive hobby ("Look! It saves lives!").

But it turns out that a standard Stearns life jacket weighs about halfway between a beer can (which works) and a beer bottle (which doesn't). So it might not be nearly as ridiculous as I thought. 

Plus, you would drop the life jacket directly, with no parachute or holder. The rescue drone would likely just be carrying the Air Dropper (53g) + the connecting cord (17g) + the life jacket (460g), for a total of 530g, a hair less than the beer can, sling, and parachute (533g). Wind resistance could be an issue, though. 

Clearly, more testing is needed. It is apparent even now, though, that you must choose to save someone by dropping either a beer or a life jacket to them, but not both. Choose wisely.


TRIAL AND ERROR: ERROR SECTION

Here are the things that do not work, at least with a drone of the Mavic Air 2's lifting capability: 

1. Bottles of beer: I first tried deploying bottles of beer, because bottles seemed classier. The Mavic Air 2 struggled mightily to lift the bottle, and was able to do it, but just barely. It could sometimes climb to an altitude but be unable to maintain it. This just wasn't going to work.

Also, I first tried this rubber sling, which is built to hang a water bottle on your waist:

I did get the bottle and the rubber sling up to a good height, and it dropped magnificently from the air dropper. The parachute deployed flawlessly. But, perhaps immensely predictably, when the cords all snapped taut upon the parachute's opening, the bottle slipped right out of its rubber holder and plunged to the grass below. 

Remarkably, the bottle survived the fall unbroken and unopened, but the incident convinced me that cans are the way to go.  As mentioned above, a beer can weighs 368 grams vs. 556 grams for the bottle, a significant savings. 

2. Thin rings bearing weight: After switching to cans, I did tests with cans of seltzer water we had around (less mess in case of disaster), and connected parachute to cargo with split rings found on cheap key tags we had around: 


The first drop worked beautifully. But I failed to check my equipment on the repeat drop, though, and the can plunged to the ground and destroyed itself. (This was the only payload loss of the project: No beers were harmed.) 

The rings had clearly bent a bit on the first drop and that middle one there failed altogether on the second drop: 

These rings ended up working nicely for another use (clipping the whole package to the air dropper itself), but were not able to hold up to the force of the parachute snapping open and decelerating the payload. I bought heavier rings ($6.91 for 10 from Amazon), and they work nicely: 

3. Going too high. At 120 feet, even with hardly any wind, the parachute drifted off into a tree:

I was able to rescue it by tying a gravity hook that doubles as a grappling hook ($33.99 at a Amazon for two of 'em) to the drone and fishing the chute out of the tree:

This is exactly the kind of task I bought the grappling hook for, and if you wonder whether it makes its user feel like Batman, yes, it does.


TRIAL AND ERROR: SUCCESS SECTION

So, here's what did work for me. (If someone wants to write to me and tell me how people who actually know what they're doing build a payload-parachute package, I'm all ears.)

What's strapped to the drone
The payload package has three parts: Parachute, connecting cord, and payload container (containing payload). Thus makes the whole thing modular, and easy to store separately.

1. PARACHUTE:

Take your parachute: 

Toss a cheap carabiner on the end: 

Fold the parachute up nicely:

(I learned this from this YouTube video, where they actually did a much more careful job. Feel free to fold your parachute more carefully than I did.)

2. CONNECTING CORD:


This has the strong rings tied to the ends, and the small rings attached to them. Parachute and payload get attached to the strong rings on either end, and the small rings attach to the air dropper. This holds the whole package in place nicely, and allows the weight of the payload to pull the parachute open.

3. PAYLOAD CONTAINER: 

This doesn't look very impressive:


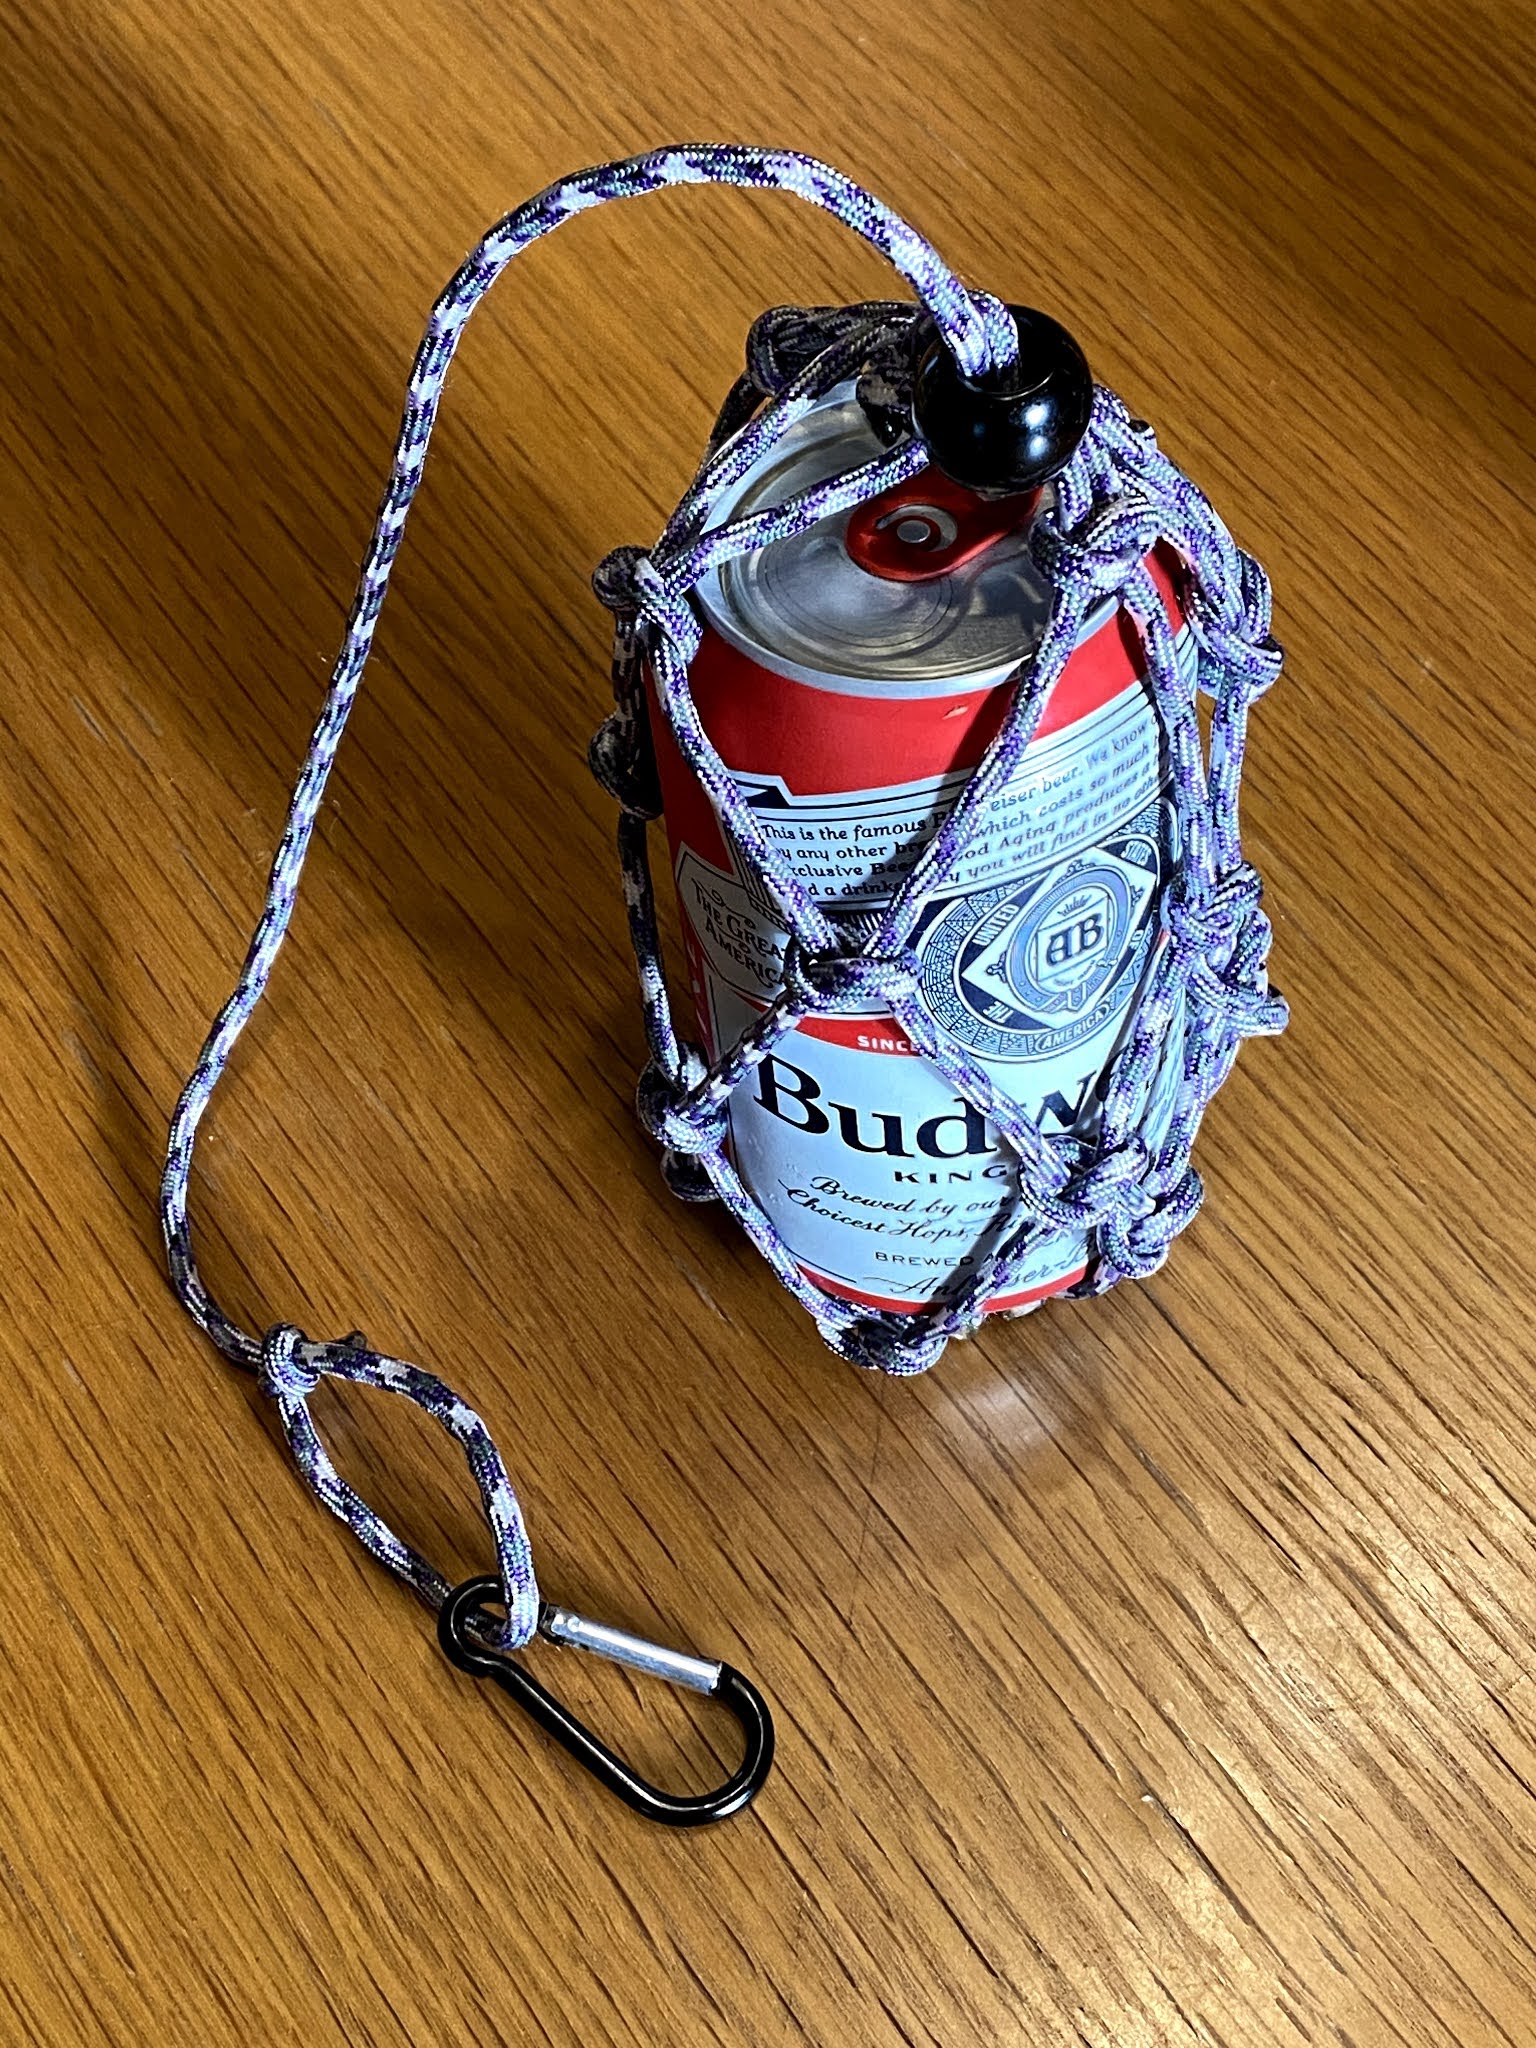
But check it out when it has a beer can in it!:

This sling is very sturdy. (Again, instructions here.) 

A metal ring at the bottom has been wrapped by many loops of paracord, which makes sure the can does not slip out, even under force:
Wrapping the parachute: After you connect all three pieces, the trick is to hold the parachute and wrap the connecting cord tightly around the parachute, then gather the two small rings together:


This holds everything together as the payload is lifted. When both small rings are released when the payload is dropped, the weight of the payload immediately begins to spin the cord off the chute, pull the parachute lines out of the parachute, and pops the parachute open. 


Launching the drone: Keep the payload away from the propellers. It works to tuck the chute under the drone, or right next to the gimbal. If you tip it back too far, though, the rear props might hit the ground when they spin up.

The air dropper came with leg extenders, which I was too lazy to put on, but which would probably have made a launch a little easier. A hand launch would also work well for this. (Landing is easier, as the parachute should no longer be attached.)


DROP HEIGHT

70 feet: Not Enough. I mean, the parachute opened, but the can hit the ground pretty hard:


You're gonna have to wait to drink that one.

120 feet: Too Much. As mentioned before, the extra height allowed the chute to open high in the air, and drift off into a tree:


90 feet: Just Right. Drops from 90 feet worked consistently:


It was a very gentle landing, and it went from free-fall to drifting close enough to the ground that the parachute couldn't drift very far. 

Your mileage may vary, of course, depending on the parachute, the payload, the weather conditions, etc.

Enjoy! Questions? Comments? Failures? Successes? Let me know via email or Twitter (@thmoore).

Saturday, September 9, 2017

CarPlay Report: Alpine ILX-107 in a 2014 Toyota Prius v


My lovely wife and I recently bought a used 2014 Toyota Prius v. Great car. Lousy stock stereo. I was surprised at just how ungainly Toyota's Entune system is. I'd been waiting for Alpine's ILX-107 to come out with its fancy wireless CarPlay, because I'm an Apple guy and it looked promising. It was released, I ordered one from NewEgg that came with a $200 gift card I used to buy the installation accessories, and I trucked it all over to Best Buy to have their guys install it.

In doing my research on the system, there were some questions I couldn't get answered. I thought I'd take a few pictures and video to better demonstrate some of the details of how all this works.

Here's what I started with: the stock Prius v radio:


Install: Parts

Here's what I bought for the install:

This thing connects the antenna:


This thing connects the USB port on the dashboard to the radio:


This is a major piece – The Maestro connects the steering-wheel controls to the radio. It's supposed to do a few other things also, but could not be made to do so:


This is the Toyota-specific installation harness:


This is the Toyota-specific wiring harness.


This is the dashboard kit for the Prius. Surprisingly, it was one of the cheaper parts on this list:


And this is the radio itself:


Install: Process

It was a pretty elaborate install. The guys at Best Buy had not seen this radio before. The install cost $99 for the radio and $59 for the Maestro programming and install. I got my money's worth:


The estimate had been two hours. It took closer to five.

When it was done, some things worked great, and others had problems. The "AUX" icon wan't showing on the main screen. The "Gauges" icon was there, but the gauges (fuel, RPM, speed, etc.) weren't showing anything. And the "Camera" icon was there all the time, but never showed anything, because the camera was only powered on when the car was in reverse (and then you didn't need to hit the "Camera" button...)

What worked great was the wireless CarPlay, which was the main thing that this radio was supposed to provide. The AM/FM radio also seemed to work well. The backup camera worked really well.

Still, of the four icons on the main screen (Radio / CarPlay / Camera / Gauges), only the first two did anything. So I scheduled a return visit to Best Buy to get it fixed up as best as I could. Here's what I ended up with:


All the icons work now. The camera is now powered on all the time, so if I'm driving down the highway and want to watch the car behind me for some reason, I just hit the button.

The guy at Best Buy spent the whole day on the phone with the guys at Maestro trying to get the "Gauges" icon to work. They were unable to do so. Best guess is that the radio needs a firmware update. So he hid the "gauges" icon and all is well. On a Prius, you don't really get anything that helpful.

The AUX input now works well. They had to wire it directly into the radio and bypass the Maestro. The Prius has a USB input and a minijack audio input on the dashboard; the USB can be used to update the radio firmware, change the starting screen, and play video into the unit. You have to be in park, with the emergency brake on, for the video to show. Sadly, you can't go straight from a lightning connection on an iPad, say, to the unit:


You likely have to get one of these:


...and then, I'm guessing, get a male USB-to-Male USB cable. I don't have one of these and have not tested this yet. The Alpine 's a smaller screen than my iPad, so I doubt I'll be doing much of this.

System Responsiveness

Turning the system on:

The bootup time is pretty good; you're ready to go in 15 seconds, and CarPlay wirelessly connects in about another 7 seconds:


Backup Camera:

But for me, the key is how quickly the backup camera is ready to go; I need to be able to start the car, throw it into reverse and get going. This responsiveness is excellent; it takes less than a second after putting the car into reverse for the camera to kick in:


The interface's responsiveness is also terrific; you can flip from function to function, and from CarPlay app to CarPlay app, very quickly:

Radio

The radio works well; it's pretty standard. Each station has two different ways to view it, which give more information depending on how the station is broadcasting:


Siri

Siri is terrifically responsive. She'll only do a small, safe subset of her normal tasks, but they have picked the right ones:


Interestingly, your iPhone's screen serves as a second screen for the radio when you're navigating:


Switching Music

If you walk into your car playing music on your iPhone, it'll pop over into the car stereo reasonably quickly: 


iOS 11

Throughout this article, you're seeing the iOS 11 version of CarPlay; I've been running the beta on my iPhone. 

One thing it adds is a battery indicator your phone when it's not plugged in:


vs. when it is:


I'm delighted with this radio. Alpine's done a great job of making everything look Apple-like and getting its own stuff out of the way.




Monday, February 20, 2017

Prius v - VIN # JTDZN3EU1E3293659 has been wrecked!

Unpleasant experience today trying to buy a 2014 Prius v, VIN# JTDZN3EU1E3293659, from Pure Car Buying of Dumfries, VA.  The car was a good price, about $19,000, with only about 9,000 miles on it. The CARFAX report was clean.  I was assured over the phone that the car was fresh off a lease, it had been in no accidents, and there would be no unpleasant surprises if I drove an hour+ to go see it. 

I drove to Dumfries and I picked up the car, which seemed very nice. I took it to my mechanic, who checked it out carefully and told me: "This car has been in a major accident, and the whole front end has been rebuilt. It has some of the worst repainting we've ever seen. Do not buy it under any circumstances." I did not.

Just wanted to get this little story, and the VIN number, out onto the Internet so no one who Googles it runs the risk of buying this car. Write to me at tom@moores.org if you have any questions. 

Thursday, January 30, 2014

Roscoe

Roscoe is our new dog. He's a good dog, and his microchip number is 985112000765035. We signed him up with "Free Pet Chip Registry," but wanted to make sure that you could Google his number also. If you find our beloved Roscoe, please drop us a line at tom@moores.org.

Monday, December 2, 2013

Good songs for a holiday video


I enjoy creating family videos as our Christmas card.  I struggle every year to find the right music.  Here are some tunes that have worked nicely for us:

Main Title: Nemo Egg from the Finding Nemo soundtrack
Reprise by Patty Griffin
Main Title from the Charlotte’s Web soundtrack
Arrival of the Birds by Cinematic Orchestra
Heartbeats by José González


Sunday, October 21, 2012

OS X Server: One "Logging in to the account failed because an error occurred" fix!

Here's one solution to the irritating OS X Server "You are unable to log in to the user account 'xxxx' at this time. Logging in to the account failed because an error occurred" error.

Check the client machine.  The Mac that wouldn't log on had somehow flipped its network settings to "DHCP" from the static IP setting it had been on.  Checking what the IP and DNS addresses should be on the server side and then plugging them into the client worked like a charm!